Modifying My Steam Deck
The 13th of April, 2024
I bought a Steam Deck a couple weeks ago on ebay because the prices were pretty cheap on the gen 1 models. I got a 64gb model with the intent of modifying it and putting a 1tb drive in. If you know me, you know I’m a bit lazy and I like to put things off, so I played it in it’s 64gb state for about two weeks… (I even finished both Half Life games in that time!) However, today was finally the day!!! I even bought some new tools for it!
Cracking it open
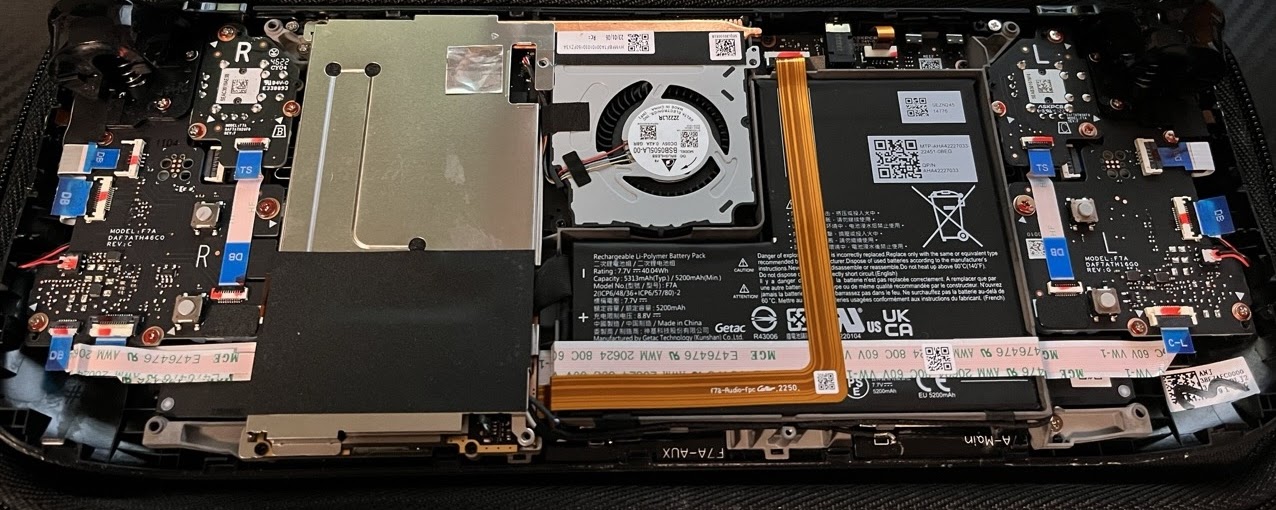
After a few agonizing minutes with a pry tool, I finally cracked the case open and what a beautiful sight it was.. The next step was removing the heat/rf shield and that was a very simple task!
The Woes of the Battery Cable
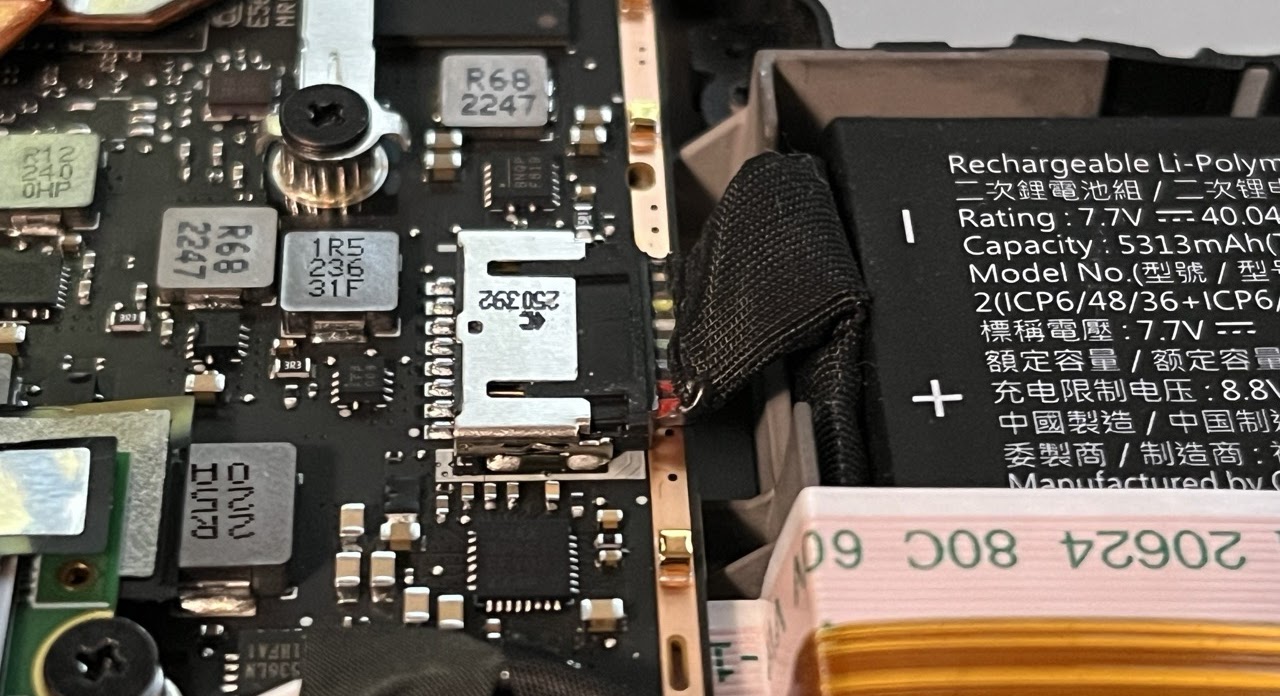
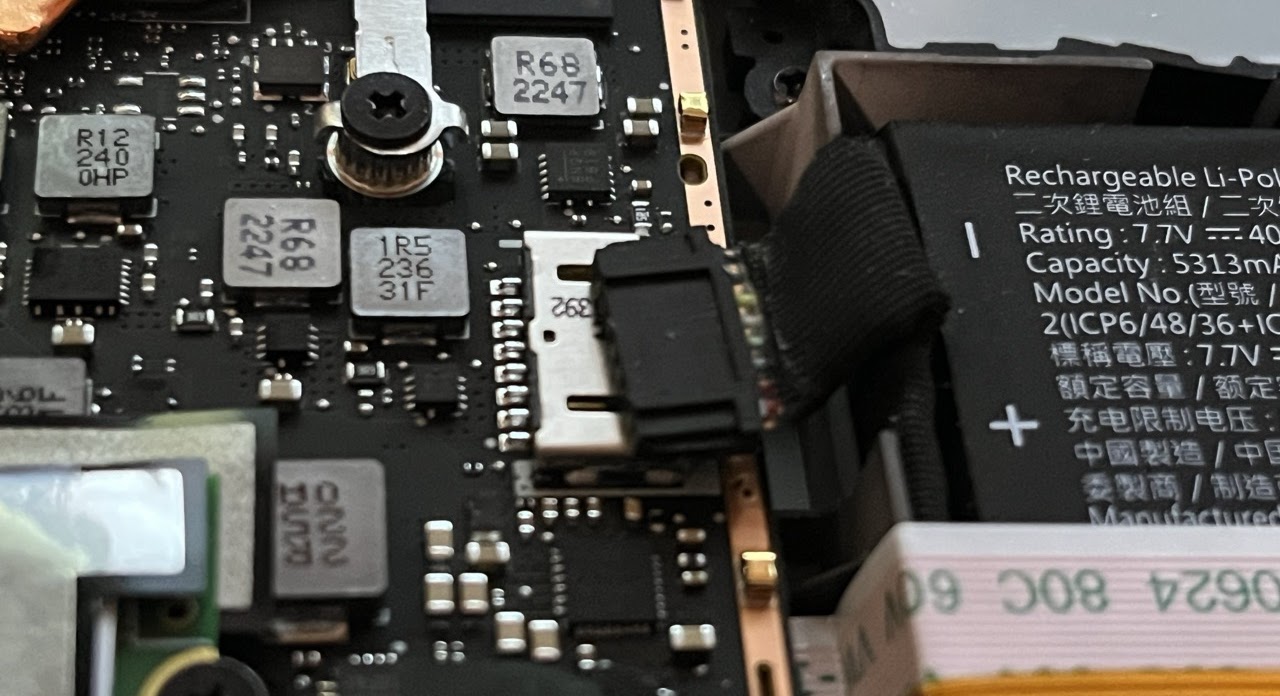
Getting the battle cable out is a pretty easy job if you have a normal Steam Deck, however for some reason mine didn’t have a pull tab!! A cruel twist of fate… I had to pry and pry with my finger nail, obviously having to be careful with the delicate pieces that surround it.
Battle's End
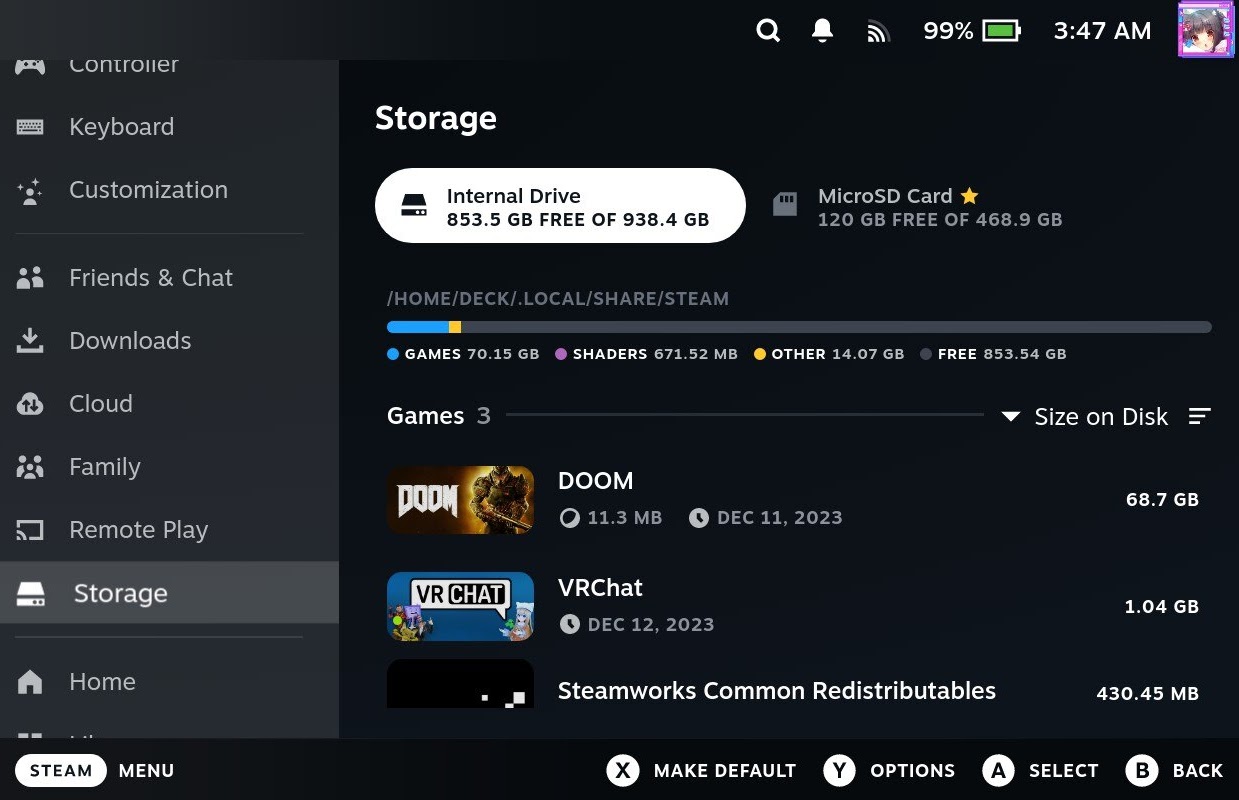
Finally after an eternity of gentle prying it finally pops out!! After this my woes are pretty much over on the hardware side of things. Removing the SSD is easy as cake, and the heat shield sticker that surrounds it comes off easily too! I simply install my little 1tb SSD and take the old one out and seal everything back up! And after running a quick SteamOS installer, I have a 1tb Steam Deck! Behold!
On Steam Deck Modifications
Some things are a little annoying with the Steam Deck when you are trying to work on it. Having to pry at the case to pop it open will quickly become annoying and in my case the battery cable not having a pull tab makes disconnecting the battery a bit of a pain. Even when considering these things, however, I still feel like the Steam Deck is pretty easy to work with. I can absolutely see myself making further modifications and working on it in the future, and I would recommend you do to! Right now the 64gb Gen 1 models can be had for dirt cheap used, and if you are willing to do what I’ve done here, you can have a great lil game console on the cheap!
Part 2
Some Simple and Fun Cosmetic Modifications
After the SSD upgrade (that I posted a blog about lol) I’d decided I’d not put any more money into the deck and simply wait for the second Steam Deck, saving my money for that model, but I’m not one who is strong against the temptation of fun lil goofy things and thats why I’m here today with two lil mods to my Steam Deck that make it extra fun!!!
First I would like to talk about the D-Brand skin (I may have been victim to linus tech tips marketing strategies but we won’t talk about that)
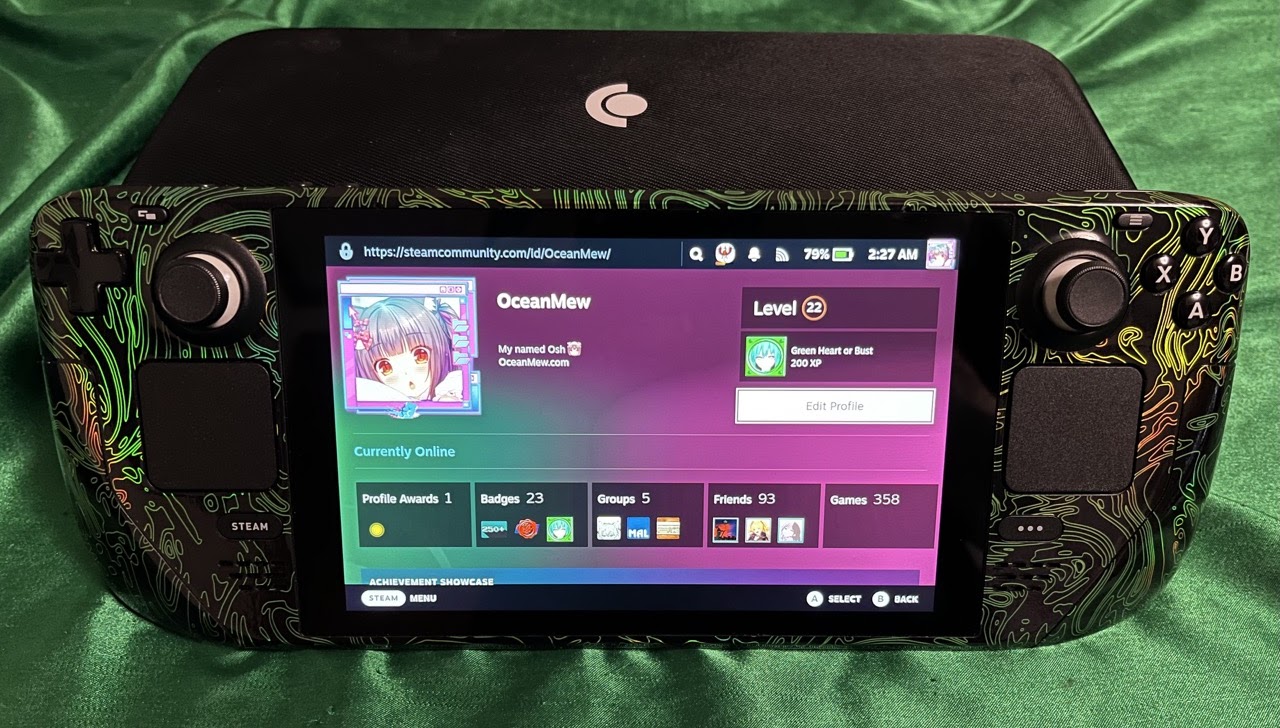
This skin is really fun because it’s got the metallic stuff inside it like a holographic pokemon card so the design shimmers and glistens in the light. Of course I’m presenting it to you here as a static image so that appeal is mostly lost, but can you really expect me to bother with making a gif!? Even in the static image the effect still shows, so you can see it a bit.
I will say applying this was kind of a pain. Not hard by any means, but it’s like a screen protector but you have to apply it on corners and curves and it’s lowkey a bit of a pain. You’ll never install it 100% perfectly because of how complex it is. But after messing with a hair dryer and playing around with this big glorified sticker for like a full hour it ended up with a pretty respectable result in my opinion.
Secondly is this cool jsaux backplate.
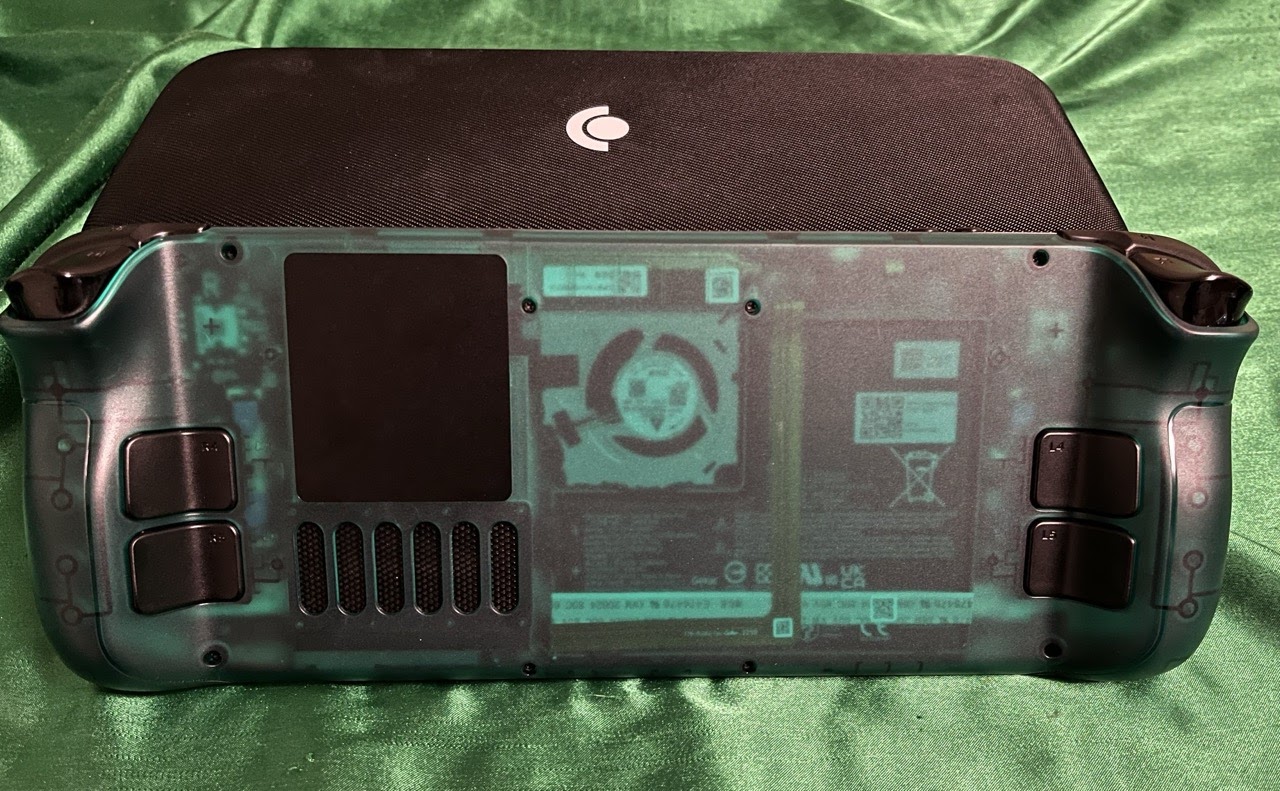
I have a lot less to say about this thing, you can see it has that lovely 90s transparent plastic look like a gameboy color or something. You may also notice that aluminum square on the back, we’ll talk about that in a second. Installation of this thing is way more simple than the D-brand skin thing. Just unscrew the old back and screw on this new one, it’s seriously that easy. However I did one extra step with mine. That square on the back is for thermals and it’s been designed very poorly. Basically, the heat sink that connects to that thing on the back restricts airflow inside the case and makes some components really hot because it suffocates them. So, before installation I just ripped that little thermal pad off and now it functionally acts like a normal steam deck back plate. Thats right! The cool aluminum square doesn’t do anything at all! Truly amazing!
I think this is the final form of my Steam Deck, at least for the time being…. maybe…